🎯 Learning Path:
- Complete REL-ID Complete Activation & Login Flow Codelab
- Complete REL-ID Additional Device Activation Flow Codelab
- Complete REL-ID Forgot Password Flow Codelab
- You are here → LDA Toggling Implementation
Welcome to the REL-ID LDA Toggling codelab! This tutorial builds upon your existing MFA implementation to add seamless authentication mode switching capabilities, allowing users to toggle between password and Local Device Authentication(LDA).
What You'll Build
In this codelab, you'll enhance your existing MFA application with:
- 🔐 LDA Management Screen: Interactive list of available authentication methods with toggle switches
- 🔄 Two-Way Authentication Switching: Enable switching from Password to LDA and LDA to Password
- 📱 Device Capability Detection: Automatic detection and display of supported authentication types
- 🎛️ Real-time Status Updates: Live feedback on authentication mode changes
- 🛡️ Secure Revalidation Flow: Password verification or consent prompts during mode switching
What You'll Learn
By completing this codelab, you'll master:
- Device Authentication Details API: Retrieving supported LDA types using
getDeviceAuthenticationDetails() - Authentication Mode Management: Implementing
manageDeviceAuthenticationModes()for toggling - Event-Driven Status Updates: Handling
onDeviceAuthManagementStatusfor real-time feedback - Challenge Mode Routing: Managing password verification and consent flows during toggling
- Type-Safe Implementation: Building robust TypeScript interfaces for LDA data structures
- Production UI Patterns: Creating intuitive toggle interfaces with loading and error states
Prerequisites
Before starting this codelab, ensure you have:
- ✅ Completed REL-ID MFA Codelab - All MFA screens and flows must be fully implemented
- ✅ React Native Development Environment - Android Studio, Xcode, and React Native CLI configured
- ✅ REL-ID SDK Integration - Latest SDK with LDA toggling support
- ✅ TypeScript Knowledge - Understanding of TypeScript interfaces and type safety patterns
- ✅ Device with Biometrics - Physical device or emulator with biometric authentication enrolled
Get the Code from GitHub
The code to get started can be found in a GitHub repository.
You can clone the repository using the following command:
git clone https://github.com/uniken-public/codelab-react-native.git
Navigate to the relid-MFA-lda-toggling folder in the repository you cloned earlier
Codelab Architecture Overview
This codelab extends your MFA application with four core LDA toggling components:
- LDA Type Definitions: TypeScript interfaces for authentication capabilities and status events
- Service Layer Integration: API methods for retrieving and managing authentication modes
- Event Management: Event handlers for
onDeviceAuthManagementStatuscallback - LDA Toggling Screen: Interactive UI for displaying and toggling authentication methods
Before implementing LDA toggling functionality, let's understand the key SDK events, APIs, and workflows that power authentication mode switching.
LDA Toggling Overview
LDA Toggling enables users to seamlessly switch between authentication methods:
Toggling Type | Description | User Action |
Password → LDA | Switch from password to LDA | User enables LDA such as biometric authentication |
LDA → Password | Switch from LDA to password | User disables LDA |
Core LDA Toggling APIs
The REL-ID SDK provides these essential APIs for LDA management:
API Method | Purpose | Response Type |
Retrieve available LDA types and their configuration status | Sync callback with authentication capabilities | |
Enable or disable specific LDA type | Sync callback + async event | |
Receive status update after mode change | Async event callback |
LDA Toggling Event Flow
The authentication mode switching process follows this event-driven pattern:
LDA Toggling Screen → getDeviceAuthenticationDetails() API → Display Available LDA Types →
User Toggles Switch → manageDeviceAuthenticationModes() API →
[getPassword or getUserConsentForLDA Event] →
onDeviceAuthManagementStatus Event → UI Update with Status
Authentication Type Mappings
The SDK uses numeric identifiers for different authentication types:
Authentication Type | Value | Platform | Description |
| 1 | iOS/Android | Touch ID / Fingerprint |
| 2 | iOS/Android | Face ID / Face Recognition |
| 3 | Android | Pattern Authentication |
| 4 | Android | Biometric Authentication |
| 9 | iOS/Android | Biometric Authentication |
Challenge Modes in LDA Toggling
During LDA toggling, the SDK may trigger revalidation events with specific challenge modes:
Challenge Mode | Event Triggered | Purpose | User Action Required |
0 or 5 or 15 |
| Verify existing password before toggling | User enters current password |
14 |
| Set new password when disabling LDA | User creates new password |
16 |
| Get consent for LDA enrollment | User approves or denies the consent to setup LDA |
Response Structure Examples
getDeviceAuthenticationDetails Response:
{
  "authenticationCapabilities": [
    {
      "authenticationType": 4,
      "isConfigured": 1
    },
    {
      "authenticationType": 9,
      "isConfigured": 0
    }
  ],
  "error": {
    "longErrorCode": 0,
    "shortErrorCode": 0,
    "errorString": "Success"
  }
}
onDeviceAuthManagementStatus Response:
{
  "userID": "john.doe@example.com",
  "OpMode": 1,
  "ldaType": 4,
  "status": {
    "statusCode": 100,
    "statusMessage": "Success"
  },
  "error": {
    "longErrorCode": 0,
    "shortErrorCode": 0,
    "errorString": "Success"
  }
}
Let's implement the TypeScript interfaces for LDA toggling data structures.
Add LDA Authentication Capability Types
Add these TypeScript definitions to your existing rdnaEvents.ts file:
// src/uniken/types/rdnaEvents.ts (additions in User Authentication Events section)

/**
 * RDNA Authentication Capability
 * Individual authentication type configuration for LDA management
 */
export interface RDNAAuthenticationCapability {
  authenticationType: number;
  isConfigured: number; // 1 = enabled, 0 = disabled
}

/**
 * RDNA Device Authentication Details Data
 * Response structure for getDeviceAuthenticationDetails (sync callback only)
 */
export interface RDNADeviceAuthenticationDetailsData {
  authenticationCapabilities: RDNAAuthenticationCapability[];
  error: RDNAError;
}

/**
 * RDNA Device Auth Management Status Data
 * Event triggered after manageDeviceAuthenticationModes call (async event)
 */
export interface RDNADeviceAuthManagementStatusData {
  userID: string;
  OpMode: number; // 1 = enable, 0 = disable
  ldaType: number;
  status: RDNAStatus;
  error: RDNAError;
}
Add LDA Management Callback Type
Add the callback type definition for the async event:
// src/uniken/types/rdnaEvents.ts (additions in LDA Management Callbacks section)

// LDA Management Callbacks
export type RDNADeviceAuthManagementStatusCallback = (data: RDNADeviceAuthManagementStatusData) => void;
Type Definition Architecture
These types follow the established REL-ID SDK pattern:
Type Category | Purpose | Usage Pattern |
Data Interfaces | Structure API responses and event data | Used in Promise return types and event handlers |
Callback Types | Define event handler signatures | Used in event manager for type-safe callbacks |
Now let's implement the LDA toggling APIs in your service layer following established REL-ID SDK patterns.
Add getDeviceAuthenticationDetails Method
Add this method to your rdnaService.ts:
// src/uniken/services/rdnaService.ts (addition after setUserConsentForLDA)

/**
 * Gets device authentication details
 *
 * This method retrieves the current authentication mode details and available authentication types.
 * The SDK returns the data directly in the sync callback response.
 * Uses sync response pattern similar to other API methods.
 *
 * @see https://developer.uniken.com/docs/getdeviceauthenticationdetails
 *
 * Response Validation Logic:
 * 1. Check error.longErrorCode: 0 = success, > 0 = error
 * 2. Data is returned in the sync callback response
 * 3. No async event is triggered for this API
 *
 * @returns Promise<RDNADeviceAuthenticationDetailsData> that resolves with authentication details
 */
async getDeviceAuthenticationDetails(): Promise<RDNADeviceAuthenticationDetailsData> {
  return new Promise((resolve, reject) => {
    console.log('RdnaService - Getting device authentication details');

    RdnaClient.getDeviceAuthenticationDetails(response => {
      console.log('RdnaService - GetDeviceAuthenticationDetails sync callback received');

      const rawResponse = response as any;

      // Parse the nested response - structure is { error: {...}, response: "{...json...}" }
      let parsedData: any;
      try {
        if (rawResponse.response && typeof rawResponse.response === 'string') {
          parsedData = JSON.parse(rawResponse.response);
        } else if (typeof response === 'string') {
          parsedData = JSON.parse(response);
        } else {
          parsedData = response;
        }
      } catch (error) {
        console.error('RdnaService - Failed to parse response:', error);
        parsedData = rawResponse;
      }

      // Check error from the outer response object
      if (rawResponse.error && rawResponse.error.longErrorCode === 0) {
        console.log('RdnaService - GetDeviceAuthenticationDetails sync response success');

        const result: RDNADeviceAuthenticationDetailsData = {
          authenticationCapabilities: parsedData.authenticationCapabilities || [],
          error: rawResponse.error
        };

        resolve(result);
      } else {
        console.error('RdnaService - GetDeviceAuthenticationDetails sync response error:', rawResponse.error);
        reject({
          authenticationCapabilities: [],
          error: rawResponse.error
        });
      }
    });
  });
}
Add manageDeviceAuthenticationModes Method
Add this method after getDeviceAuthenticationDetails:
// src/uniken/services/rdnaService.ts (continued addition)

/**
 * Manages device authentication modes (enables or disables LDA types)
 *
 * This method initiates the process of switching authentication modes.
 * The SDK may return data directly in the sync callback or trigger async events.
 * The flow may also trigger getPassword or getUserConsentForLDA events based on the scenario.
 * Uses sync response pattern similar to other API methods.
 *
 * @see https://developer.uniken.com/docs/managedeviceauthenticationmodes
 *
 * Response Validation Logic:
 * 1. Check error.longErrorCode: 0 = success, > 0 = error
 * 2. Data may be returned in sync callback or via onDeviceAuthManagementStatus event
 * 3. May trigger getPassword event for password verification (challenge modes: 0, 5, 14, 15)
 * 4. May trigger getUserConsentForLDA event for user consent (challenge mode: 16)
 * 5. Async events will be handled by event listeners
 *
 * @param isEnabled true to enable, false to disable the authentication type
 * @param authType The LDA type to be managed (1=Touch ID, 2=Face ID, 3=Pattern, 4=Biometric, 9=LDA)
 * @returns Promise<RDNASyncResponse | RDNADeviceAuthManagementStatusData> that resolves with response
 */
async manageDeviceAuthenticationModes(isEnabled: boolean, authType: number): Promise<RDNASyncResponse | RDNADeviceAuthManagementStatusData> {
  return new Promise((resolve, reject) => {
    console.log('RdnaService - Managing device authentication modes:', { isEnabled, authType });

    RdnaClient.manageDeviceAuthenticationModes(isEnabled, authType, response => {
      console.log('RdnaService - ManageDeviceAuthenticationModes sync callback received');

      const rawResponse = response as any;

      // Parse the nested response
      let parsedData: any;
      try {
        if (rawResponse.response && typeof rawResponse.response === 'string') {
          parsedData = JSON.parse(rawResponse.response);
        } else if (typeof response === 'string') {
          parsedData = JSON.parse(response);
        } else {
          parsedData = response;
        }
      } catch (error) {
        console.error('RdnaService - Failed to parse response:', error);
        parsedData = rawResponse;
      }

      // Check error from the outer response object
      if (rawResponse.error && rawResponse.error.longErrorCode === 0) {
        console.log('RdnaService - ManageDeviceAuthenticationModes sync response success');

        // Check if the parsed data has management status information
        if (parsedData.userID || parsedData.OpMode !== undefined || parsedData.ldaType !== undefined) {
          console.log('RdnaService - Received management status in sync callback');

          const result: RDNADeviceAuthManagementStatusData = {
            userID: parsedData.userID || '',
            OpMode: parsedData.OpMode,
            ldaType: parsedData.ldaType,
            status: parsedData.status,
            error: rawResponse.error
          };

          // Trigger the event handler manually
          const eventManager = this.eventManager;
          const handler = (eventManager as any).deviceAuthManagementStatusHandler;
          if (handler) {
            handler(result);
          }

          resolve(result);
        } else {
          // Simple sync response without management status
          resolve(rawResponse);
        }
      } else {
        console.error('RdnaService - ManageDeviceAuthenticationModes sync response error:', rawResponse.error);
        reject(rawResponse);
      }
    });
  });
}
Service Implementation Pattern
Both methods follow the established REL-ID SDK service pattern:
Pattern Element | Implementation Detail |
Promise Wrapper | Wraps native SDK callback for async/await usage |
Nested Response Parsing | Handles |
Error Validation | Checks |
Logging Strategy | Comprehensive console logging for debugging |
Manual Event Triggering | Triggers event handler when data received in sync callback |
Now let's enhance your event manager to handle the onDeviceAuthManagementStatus async event.
Register Event Listener
Add the event listener registration in rdnaEventManager.ts:
// src/uniken/services/rdnaEventManager.ts (additions)

// Add to imports
import type {
  // ... existing imports
  RDNADeviceAuthManagementStatusData,
  RDNADeviceAuthManagementStatusCallback
} from '../types/rdnaEvents';

// Add to handler properties
private deviceAuthManagementStatusHandler?: RDNADeviceAuthManagementStatusCallback;

// Add to registerEventListeners()
this.listeners.push(
  // ... existing listeners

  // LDA management event listeners
  this.rdnaEmitter.addListener('onDeviceAuthManagementStatus', this.onDeviceAuthManagementStatus.bind(this))
);
Implement Event Handler
Add the event handler method:
// src/uniken/services/rdnaEventManager.ts (continued additions)

/**
 * Handles device auth management status event
 * @param response Raw response from native SDK
 */
private onDeviceAuthManagementStatus(response: RDNAJsonResponse) {
  console.log("RdnaEventManager - Device auth management status event received");

  try {
    const authManagementStatusData: RDNADeviceAuthManagementStatusData = JSON.parse(response.response);

    console.log("RdnaEventManager - Device auth management status data:", {
      userID: authManagementStatusData.userID,
      OpMode: authManagementStatusData.OpMode,
      ldaType: authManagementStatusData.ldaType,
      statusCode: authManagementStatusData.status?.statusCode,
      errorCode: authManagementStatusData.error?.longErrorCode
    });

    if (this.deviceAuthManagementStatusHandler) {
      this.deviceAuthManagementStatusHandler(authManagementStatusData);
    }
  } catch (error) {
    console.error("RdnaEventManager - Failed to parse device auth management status response:", error);
  }
}
Add Handler Setter and Cleanup
Add the setter method and cleanup logic:
// src/uniken/services/rdnaEventManager.ts (continued additions)

// Add setter method
public setDeviceAuthManagementStatusHandler(callback?: RDNADeviceAuthManagementStatusCallback): void {
  this.deviceAuthManagementStatusHandler = callback;
}

// Add to cleanup() method
public cleanup() {
  // ... existing cleanup code

  // Clear LDA management handlers
  this.deviceAuthManagementStatusHandler = undefined;
}
Event Flow Architecture
The event management follows this pattern:
Native SDK → rdnaEmitter → onDeviceAuthManagementStatus → deviceAuthManagementStatusHandler → LDA Screen
During LDA toggling, the SDK may trigger password verification or consent events. Let's enhance your event provider to handle these challenge modes.
Update SDKEventProvider for LDA Toggling Modes
Enhance your SDKEventProvider.tsx to route LDA toggling challenge modes:
// src/uniken/providers/SDKEventProvider.tsx (enhancements)

/**
 * Handle password request events
 * Challenge modes for LDA toggling:
 * - Mode 0, 5, 15: Verify existing password
 * - Mode 14: Set new password
 */
const handleGetPassword = useCallback((data: RDNAGetPasswordData) => {
  console.log('SDKEventProvider - onGetPassword event received:', {
    userID: data.userID,
    challengeMode: data.challengeMode,
    attemptsLeft: data.attemptsLeft
  });

  if (data.challengeMode === 0 || data.challengeMode === 5 || data.challengeMode === 15) {
    // challengeMode = 0: Verify existing password (standard login)
    // challengeMode = 5: Verify password for LDA toggling (enable)
    // challengeMode = 15: Verify password for LDA toggling (disable)
    NavigationService.navigateOrUpdate('VerifyPasswordScreen', {
      eventData: data,
      title: 'Verify Password',
      subtitle: data.challengeMode === 0
        ? 'Enter your password to continue'
        : 'Enter your password to change authentication method',
      userID: data.userID,
      challengeMode: data.challengeMode,
      attemptsLeft: data.attemptsLeft,
      responseData: data,
    });
  } else if (data.challengeMode === 1 || data.challengeMode === 14) {
    // challengeMode = 1: Set new password (standard flow)
    // challengeMode = 14: Set password for LDA toggling (disable LDA)
    NavigationService.navigateOrUpdate('SetPasswordScreen', {
      eventData: data,
      title: data.challengeMode === 14 ? 'Set Password' : 'Create New Password',
      subtitle: data.challengeMode === 14
        ? 'Set a password for password-based authentication'
        : 'Create a secure password for your account',
      responseData: data,
    });
  } else {
    console.warn('SDKEventProvider - Unknown challengeMode for getPassword:', data.challengeMode);
  }
}, []);

/**
 * Handle user consent for LDA request events
 * Challenge mode 16: LDA consent for enabling biometric authentication
 */
const handleGetUserConsentForLDA = useCallback((data: RDNAGetUserConsentForLDAData) => {
  console.log('SDKEventProvider - onGetUserConsentForLDA event received:', {
    userID: data.userID,
    challengeMode: data.challengeMode,
    authenticationType: data.authenticationType
  });

  NavigationService.navigateOrUpdate('UserLDAConsentScreen', {
    eventData: data,
    title: 'Enable Biometric Authentication',
    subtitle: 'Grant permission for biometric authentication on this device',
    responseData: data,
  });
}, []);
Challenge Mode Flow Chart
The challenge mode routing follows this decision tree:
manageDeviceAuthenticationModes() Called
│
├─ Enable LDA (isEnabled = true)
│  ├─ challengeMode = 5 → Verify Password → challengeMode = 16 → User Consent → Success
│  └─ challengeMode = 16 → User Consent → Success
│
└─ Disable LDA (isEnabled = false)
   ├─ challengeMode = 15 → Verify Password → challengeMode = 14 → Set Password → Success
   └─ challengeMode = 14 → Set Password → Success
Screen Auto-Closing Logic
Add auto-close logic to password and consent screens for LDA toggling flows:
// src/tutorial/screens/mfa/VerifyPasswordScreen.tsx (enhancement)

// Close the screen after successful password submission if challengeMode is not 0
if (challengeMode !== 0) {
  console.log('VerifyPasswordScreen - ChallengeMode is not 0, closing screen after successful password submission');
  navigation.goBack();
}
// src/tutorial/screens/mfa/SetPasswordScreen.tsx (enhancement)

// Close the screen after successful password submission if challengeMode is not 1
if (challengeMode !== 1) {
  console.log('SetPasswordScreen - ChallengeMode is not 1, closing screen after successful password submission');
  navigation.goBack();
}
// src/tutorial/screens/mfa/UserLDAConsentScreen.tsx (enhancement)

// Close the screen after successful consent submission if challengeMode is 16 (LDA toggling)
if (responseData.challengeMode === 16) {
  console.log('UserLDAConsentScreen - ChallengeMode is 16 (LDA toggling), closing screen after successful consent submission');
  navigation.goBack();
}
Now let's create the main LDA Toggling screen with interactive toggle switches.
Create Authentication Type Mapping
First, define the authentication type name mapping:
// src/tutorial/screens/lda/LDATogglingScreen.tsx (new file)

/**
 * Authentication Type Mapping
 * Maps authenticationType number to human-readable name
 * Based on RDNA.RDNALDACapabilities enum mapping
 */
const AUTH_TYPE_NAMES: Record<number, string> = {
  0: 'None',
  1: 'Biometric Authentication',  // RDNA_LDA_FINGERPRINT
  2: 'Face ID',                    // RDNA_LDA_FACE
  3: 'Pattern Authentication',     // RDNA_LDA_PATTERN
  4: 'Biometric Authentication',  // RDNA_LDA_SSKB_PASSWORD
  9: 'Biometric Authentication',  // RDNA_DEVICE_LDA
};
Implement Screen State Management
Set up the screen component with proper state management:
// src/tutorial/screens/lda/LDATogglingScreen.tsx (continued)

import React, { useState, useEffect } from 'react';
import {
  View,
  Text,
  StyleSheet,
  SafeAreaView,
  TouchableOpacity,
  FlatList,
  Alert,
  ActivityIndicator,
  Switch,
} from 'react-native';
import { useRoute, useNavigation } from '@react-navigation/native';
import rdnaService from '../../../uniken/services/rdnaService';
import type {
  RDNADeviceAuthManagementStatusData,
  RDNAAuthenticationCapability,
} from '../../../uniken/types/rdnaEvents';

const LDATogglingScreen: React.FC = () => {
  const route = useRoute();
  const navigation = useNavigation();

  const { userID, sessionID, sessionType, jwtToken } = route.params || {};

  const [isLoading, setIsLoading] = useState<boolean>(true);
  const [authCapabilities, setAuthCapabilities] = useState<RDNAAuthenticationCapability[]>([]);
  const [error, setError] = useState<string | null>(null);
  const [processingAuthType, setProcessingAuthType] = useState<number | null>(null);

  useEffect(() => {
    loadAuthenticationDetails();

    // Set up event handler for auth management status (only async callback needed)
    const eventManager = rdnaService.getEventManager();
    eventManager.setDeviceAuthManagementStatusHandler(handleAuthManagementStatusReceived);

    // Cleanup event handlers on unmount
    return () => {
      eventManager.setDeviceAuthManagementStatusHandler(undefined);
    };
  }, []);
Implement Data Loading
Add the method to load authentication details:
// src/tutorial/screens/lda/LDATogglingScreen.tsx (continued)

/**
 * Load authentication details from the SDK
 * Data is returned directly in the sync callback, no async event
 */
const loadAuthenticationDetails = async () => {
  setIsLoading(true);
  setError(null);

  try {
    console.log('LDATogglingScreen - Calling getDeviceAuthenticationDetails API');
    const data = await rdnaService.getDeviceAuthenticationDetails();
    console.log('LDATogglingScreen - getDeviceAuthenticationDetails API call successful');

    // Check for errors
    if (data.error.longErrorCode !== 0) {
      const errorMessage = data.error.errorString || 'Failed to load authentication details';
      console.error('LDATogglingScreen - Authentication details error:', data.error);
      setError(errorMessage);
      setIsLoading(false);
      return;
    }

    const capabilities = data.authenticationCapabilities || [];
    console.log('LDATogglingScreen - Received capabilities:', capabilities.length);

    setAuthCapabilities(capabilities);
    setIsLoading(false);
  } catch (error: any) {
    console.error('LDATogglingScreen - getDeviceAuthenticationDetails error:', error);
    const errorMessage = error?.error?.errorString || 'Failed to load authentication details';
    setError(errorMessage);
    setIsLoading(false);
  }
};
Handle Event Callbacks
Implement the async event handler:
// src/tutorial/screens/lda/LDATogglingScreen.tsx (continued)

/**
 * Handle auth management status received from onDeviceAuthManagementStatus event
 */
const handleAuthManagementStatusReceived = (data: RDNADeviceAuthManagementStatusData) => {
  console.log('LDATogglingScreen - Received auth management status event');
  setProcessingAuthType(null);

  // Check for errors
  if (data.error.longErrorCode !== 0) {
    const errorMessage = data.error.errorString || 'Failed to update authentication mode';
    console.error('LDATogglingScreen - Auth management status error:', data.error);

    Alert.alert('Update Failed', errorMessage, [{ text: 'OK' }]);
    return;
  }

  // Check status
  if (data.status.statusCode === 100) {
    const opMode = data.OpMode === 1 ? 'enabled' : 'disabled';
    const authTypeName = AUTH_TYPE_NAMES[data.ldaType] || `Authentication Type ${data.ldaType}`;

    console.log('LDATogglingScreen - Auth management status success:', data.status.statusMessage);

    Alert.alert(
      'Success',
      `${authTypeName} has been ${opMode} successfully.`,
      [
        {
          text: 'OK',
          onPress: () => {
            // Refresh authentication details to get updated status
            loadAuthenticationDetails();
          }
        }
      ]
    );
  } else {
    const statusMessage = data.status.statusMessage || 'Unknown error occurred';
    console.error('LDATogglingScreen - Auth management status error:', statusMessage);

    Alert.alert(
      'Update Failed',
      statusMessage,
      [
        {
          text: 'OK',
          onPress: () => {
            // Refresh authentication details to get updated status
            loadAuthenticationDetails();
          }
        }
      ]
    );
  }
};
Implement Toggle Handler
Add the toggle switch change handler:
// src/tutorial/screens/lda/LDATogglingScreen.tsx (continued)

/**
 * Handle toggle switch change
 */
const handleToggleChange = async (capability: RDNAAuthenticationCapability, newValue: boolean) => {
  const authTypeName = AUTH_TYPE_NAMES[capability.authenticationType] || `Authentication Type ${capability.authenticationType}`;

  console.log('LDATogglingScreen - Toggle change:', {
    authenticationType: capability.authenticationType,
    authTypeName,
    currentValue: capability.isConfigured,
    newValue
  });

  if (processingAuthType !== null) {
    console.log('LDATogglingScreen - Another operation is in progress, ignoring toggle');
    return;
  }

  setProcessingAuthType(capability.authenticationType);

  try {
    console.log('LDATogglingScreen - Calling manageDeviceAuthenticationModes API');
    await rdnaService.manageDeviceAuthenticationModes(newValue, capability.authenticationType);
    console.log('LDATogglingScreen - manageDeviceAuthenticationModes API call successful');
    // Response will be handled by handleAuthManagementStatusReceived
  } catch (error) {
    console.error('LDATogglingScreen - manageDeviceAuthenticationModes API error:', error);
    setProcessingAuthType(null);

    Alert.alert(
      'Update Failed',
      'Failed to update authentication mode. Please try again.',
      [{ text: 'OK' }]
    );
  }
};
Render UI Components
Implement the list item rendering:
// src/tutorial/screens/lda/LDATogglingScreen.tsx (continued)

/**
 * Render authentication capability item
 */
const renderAuthCapabilityItem = ({ item }: { item: RDNAAuthenticationCapability }) => {
  const authTypeName = AUTH_TYPE_NAMES[item.authenticationType] || `Authentication Type ${item.authenticationType}`;
  const isEnabled = item.isConfigured === 1;
  const isProcessing = processingAuthType === item.authenticationType;

  return (
    <View style={styles.authItem}>
      <View style={styles.authInfo}>
        <Text style={styles.authTypeName}>{authTypeName}</Text>
        <Text style={styles.authTypeId}>Type ID: {item.authenticationType}</Text>
        <Text style={[
          styles.authStatus,
          isEnabled ? styles.statusEnabled : styles.statusDisabled
        ]}>
          {isEnabled ? 'Enabled' : 'Disabled'}
        </Text>
      </View>
      <View style={styles.toggleContainer}>
        {isProcessing ? (
          <ActivityIndicator size="small" color="#3498db" />
        ) : (
          <Switch
            value={isEnabled}
            onValueChange={(newValue) => handleToggleChange(item, newValue)}
            trackColor={{ false: '#ccc', true: '#3498db' }}
            thumbColor={isEnabled ? '#fff' : '#f4f3f4'}
            disabled={processingAuthType !== null}
          />
        )}
      </View>
    </View>
  );
};

/**
 * Render empty state
 */
const renderEmptyState = () => (
  <View style={styles.emptyContainer}>
    <Text style={styles.emptyIcon}>🔐</Text>
    <Text style={styles.emptyTitle}>No LDA Available</Text>
    <Text style={styles.emptyMessage}>
      No Local Device Authentication (LDA) capabilities are available for this device.
    </Text>
    <TouchableOpacity style={styles.refreshButton} onPress={loadAuthenticationDetails}>
      <Text style={styles.refreshButtonText}>🔄 Refresh</Text>
    </TouchableOpacity>
  </View>
);
Complete Screen Layout
Add the main render method:
// src/tutorial/screens/lda/LDATogglingScreen.tsx (continued)

return (
  <SafeAreaView style={styles.safeArea}>
    {/* Header with Menu Button */}
    <View style={styles.header}>
      <TouchableOpacity
        style={styles.menuButton}
        onPress={() => (navigation as any).openDrawer?.()}
      >
        <Text style={styles.menuButtonText}>☰</Text>
      </TouchableOpacity>
      <Text style={styles.headerTitle}>LDA Toggling</Text>
      <TouchableOpacity style={styles.refreshIconButton} onPress={loadAuthenticationDetails}>
        <Text style={styles.refreshIcon}>🔄</Text>
      </TouchableOpacity>
    </View>

    {/* Main Content */}
    <View style={styles.container}>
      {isLoading ? (
        <View style={styles.loadingContainer}>
          <ActivityIndicator size="large" color="#3498db" />
          <Text style={styles.loadingText}>Loading authentication details...</Text>
        </View>
      ) : error ? (
        <View style={styles.errorContainer}>
          <Text style={styles.errorText}>{error}</Text>
          <TouchableOpacity style={styles.retryButton} onPress={loadAuthenticationDetails}>
            <Text style={styles.retryButtonText}>Retry</Text>
          </TouchableOpacity>
        </View>
      ) : (
        <FlatList
          data={authCapabilities}
          renderItem={renderAuthCapabilityItem}
          keyExtractor={(item) => item.authenticationType.toString()}
          ListEmptyComponent={renderEmptyState}
          contentContainerStyle={styles.listContainer}
          showsVerticalScrollIndicator={false}
        />
      )}
    </View>
  </SafeAreaView>
);
Let's integrate the LDA Toggling screen into your app navigation.
Add Navigation Route
Update your navigation types and routes:
// src/tutorial/navigation/DrawerNavigator.tsx (additions)

export type DrawerParamList = {
  // ... existing routes
  LDAToggling: {
    userID: string;
    sessionID: string;
    sessionType: number;
    jwtToken: string;
    loginTime?: string;
    userRole?: string;
    currentWorkFlow?: string;
  };
};

// Add to drawer navigator
<Drawer.Screen
  name="LDAToggling"
  component={LDATogglingScreen}
  initialParams={persistedUserParams}
  options={{ drawerLabel: 'LDA Toggling' }}
/>
Add Drawer Menu Item
Update your custom drawer content:
// src/tutorial/screens/components/DrawerContent.tsx (addition)

<TouchableOpacity
  style={styles.menuItem}
  onPress={() => props.navigation.navigate('LDAToggling')}
>
  <Text style={styles.menuText}>🔐 LDA Toggling</Text>
</TouchableOpacity>
Import the Screen
Add the import statement:
// src/tutorial/navigation/DrawerNavigator.tsx (import addition)

import LDATogglingScreen from '../screens/lda/LDATogglingScreen';
Let's test your LDA toggling implementation with comprehensive scenarios.
Test Scenario 1: Enable Biometric Authentication
Setup Requirements:
- User logged in with password authentication
- Device has biometric authentication enrolled
- Navigate to LDA Toggling screen
Test Steps:
- Launch app and login with password
- Navigate to LDA Toggling from drawer menu
- Verify list displays available authentication types
- Toggle ON an authentication type (e.g., "Biometric Authentication")
- Complete password verification when VerifyPasswordScreen appears
- Approve consent when UserLDAConsentScreen appears
- Verify success alert: "Biometric Authentication has been enabled successfully"
- Confirm toggle switch shows ON state after refresh
Expected Results:
- ✅ Authentication types load correctly
- ✅ Toggle triggers password verification
- ✅ Consent flow completes successfully
- ✅ Status updates reflect enabled state
- ✅ User returns to LDA Toggling screen
- ✅ User can now login with LDA
Test Scenario 2: Disable Biometric Authentication
Setup Requirements:
- User logged in with biometric authentication enabled
- Navigate to LDA Toggling screen
Test Steps:
- Navigate to LDA Toggling screen
- Toggle OFF the enabled authentication type
- Create new password when SetPasswordScreen appears
- Complete password verification when prompted
- Verify success alert: "Biometric Authentication has been disabled successfully"
- Confirm toggle switch shows OFF state after refresh
Expected Results:
- ✅ Toggle triggers password verification
- ✅ Password creation flow completes successfully
- ✅ Status updates reflect disabled state
- ✅ User can now login with new password
Test Scenario 3: No LDA Available
Setup Requirements:
- Device without biometric authentication enrolled
- Navigate to LDA Toggling screen
Test Steps:
- Navigate to LDA Toggling screen
- Wait for authentication details to load
- Verify empty state displays
- Confirm message: "No Local Device Authentication (LDA) capabilities are available"
Expected Results:
- ✅ Empty state displays correctly
- ✅ Refresh button is available
- ✅ No toggle switches are shown
Test Scenario 4: Network Error Handling
Setup Requirements:
- Simulate network error or server unavailability
Test Steps:
- Navigate to LDA Toggling screen with poor network
- Attempt to load authentication details
- Verify error message displays
- Tap retry button
- Confirm error handling works correctly
Expected Results:
- ✅ Error message displays user-friendly text
- ✅ Retry button is functional
- ✅ Loading states work correctly
Prepare your LDA toggling implementation for production deployment with these essential considerations.
Security Validation Checklist
- [ ] No Sensitive Data Logging: Verify no authentication tokens or credentials are logged
- [ ] Proper State Management: Handle authentication state changes across app lifecycle
- [ ] Error Recovery: Graceful handling of SDK errors and network failures
- [ ] Challenge Mode Validation: Verify all challenge modes route to correct screens
User Experience Optimization
- [ ] Clear Status Feedback: Visual indicators for enabled/disabled states
- [ ] Loading States: Show progress during all async operations
- [ ] Error Messages: User-friendly errors for all failure scenarios
- [ ] Accessibility Support: Screen reader compatibility and proper labeling
- [ ] Performance: Minimize unnecessary API calls and re-renders
Code Quality Standards
- [ ] Type Safety: Full TypeScript coverage with proper type definitions
- [ ] Code Organization: Logical file structure and component separation
- [ ] Documentation: Comprehensive comments for complex logic
- [ ] Testing: Unit tests for service methods and UI components
Production Deployment Checklist
- [ ] Platform Testing: Verify on both iOS and Android devices
- [ ] Device Variety: Test on devices with different biometric capabilities
- [ ] Edge Cases: Handle devices without biometric enrollment
- [ ] Version Compatibility: Ensure SDK version compatibility
- [ ] Analytics Integration: Track toggling usage and success rates
Here's your complete reference implementation with all styling included.
Complete LDA Toggling Screen with Styles
// src/tutorial/screens/lda/LDATogglingScreen.tsx (complete file with styles)

const styles = StyleSheet.create({
  safeArea: {
    flex: 1,
    backgroundColor: '#f8f9fa',
  },
  header: {
    flexDirection: 'row',
    alignItems: 'center',
    paddingHorizontal: 16,
    paddingVertical: 12,
    backgroundColor: '#fff',
    borderBottomWidth: 1,
    borderBottomColor: '#e0e0e0',
    elevation: 2,
    shadowColor: '#000',
    shadowOffset: { width: 0, height: 2 },
    shadowOpacity: 0.1,
    shadowRadius: 4,
  },
  menuButton: {
    width: 44,
    height: 44,
    borderRadius: 22,
    backgroundColor: 'rgba(0, 0, 0, 0.05)',
    justifyContent: 'center',
    alignItems: 'center',
  },
  menuButtonText: {
    fontSize: 20,
    color: '#2c3e50',
    fontWeight: 'bold',
  },
  headerTitle: {
    fontSize: 18,
    fontWeight: 'bold',
    color: '#2c3e50',
    marginLeft: 16,
    flex: 1,
  },
  refreshIconButton: {
    width: 44,
    height: 44,
    borderRadius: 22,
    backgroundColor: 'rgba(0, 0, 0, 0.05)',
    justifyContent: 'center',
    alignItems: 'center',
  },
  refreshIcon: {
    fontSize: 18,
  },
  container: {
    flex: 1,
  },
  loadingContainer: {
    flex: 1,
    justifyContent: 'center',
    alignItems: 'center',
  },
  loadingText: {
    marginTop: 16,
    fontSize: 16,
    color: '#7f8c8d',
  },
  errorContainer: {
    flex: 1,
    justifyContent: 'center',
    alignItems: 'center',
    padding: 20,
  },
  errorText: {
    fontSize: 16,
    color: '#e74c3c',
    textAlign: 'center',
    marginBottom: 16,
  },
  retryButton: {
    backgroundColor: '#3498db',
    paddingHorizontal: 24,
    paddingVertical: 12,
    borderRadius: 8,
  },
  retryButtonText: {
    color: '#fff',
    fontSize: 16,
    fontWeight: 'bold',
  },
  listContainer: {
    padding: 16,
  },
  authItem: {
    backgroundColor: '#fff',
    borderRadius: 12,
    padding: 16,
    marginBottom: 12,
    elevation: 2,
    shadowColor: '#000',
    shadowOffset: { width: 0, height: 2 },
    shadowOpacity: 0.1,
    shadowRadius: 4,
    flexDirection: 'row',
    justifyContent: 'space-between',
    alignItems: 'center',
  },
  authInfo: {
    flex: 1,
    marginRight: 16,
  },
  authTypeName: {
    fontSize: 16,
    fontWeight: 'bold',
    color: '#2c3e50',
    marginBottom: 4,
  },
  authTypeId: {
    fontSize: 12,
    color: '#7f8c8d',
    marginBottom: 4,
  },
  authStatus: {
    fontSize: 12,
    fontWeight: '500',
    textTransform: 'uppercase',
  },
  statusEnabled: {
    color: '#27ae60',
  },
  statusDisabled: {
    color: '#95a5a6',
  },
  toggleContainer: {
    justifyContent: 'center',
    alignItems: 'center',
    minWidth: 50,
  },
  emptyContainer: {
    flex: 1,
    justifyContent: 'center',
    alignItems: 'center',
    padding: 40,
  },
  emptyIcon: {
    fontSize: 64,
    marginBottom: 16,
  },
  emptyTitle: {
    fontSize: 20,
    fontWeight: 'bold',
    color: '#2c3e50',
    marginBottom: 8,
  },
  emptyMessage: {
    fontSize: 16,
    color: '#7f8c8d',
    textAlign: 'center',
    marginBottom: 24,
    lineHeight: 24,
  },
  refreshButton: {
    backgroundColor: '#3498db',
    paddingHorizontal: 24,
    paddingVertical: 12,
    borderRadius: 8,
  },
  refreshButtonText: {
    color: '#fff',
    fontSize: 16,
    fontWeight: 'bold',
  },
});

export default LDATogglingScreen;
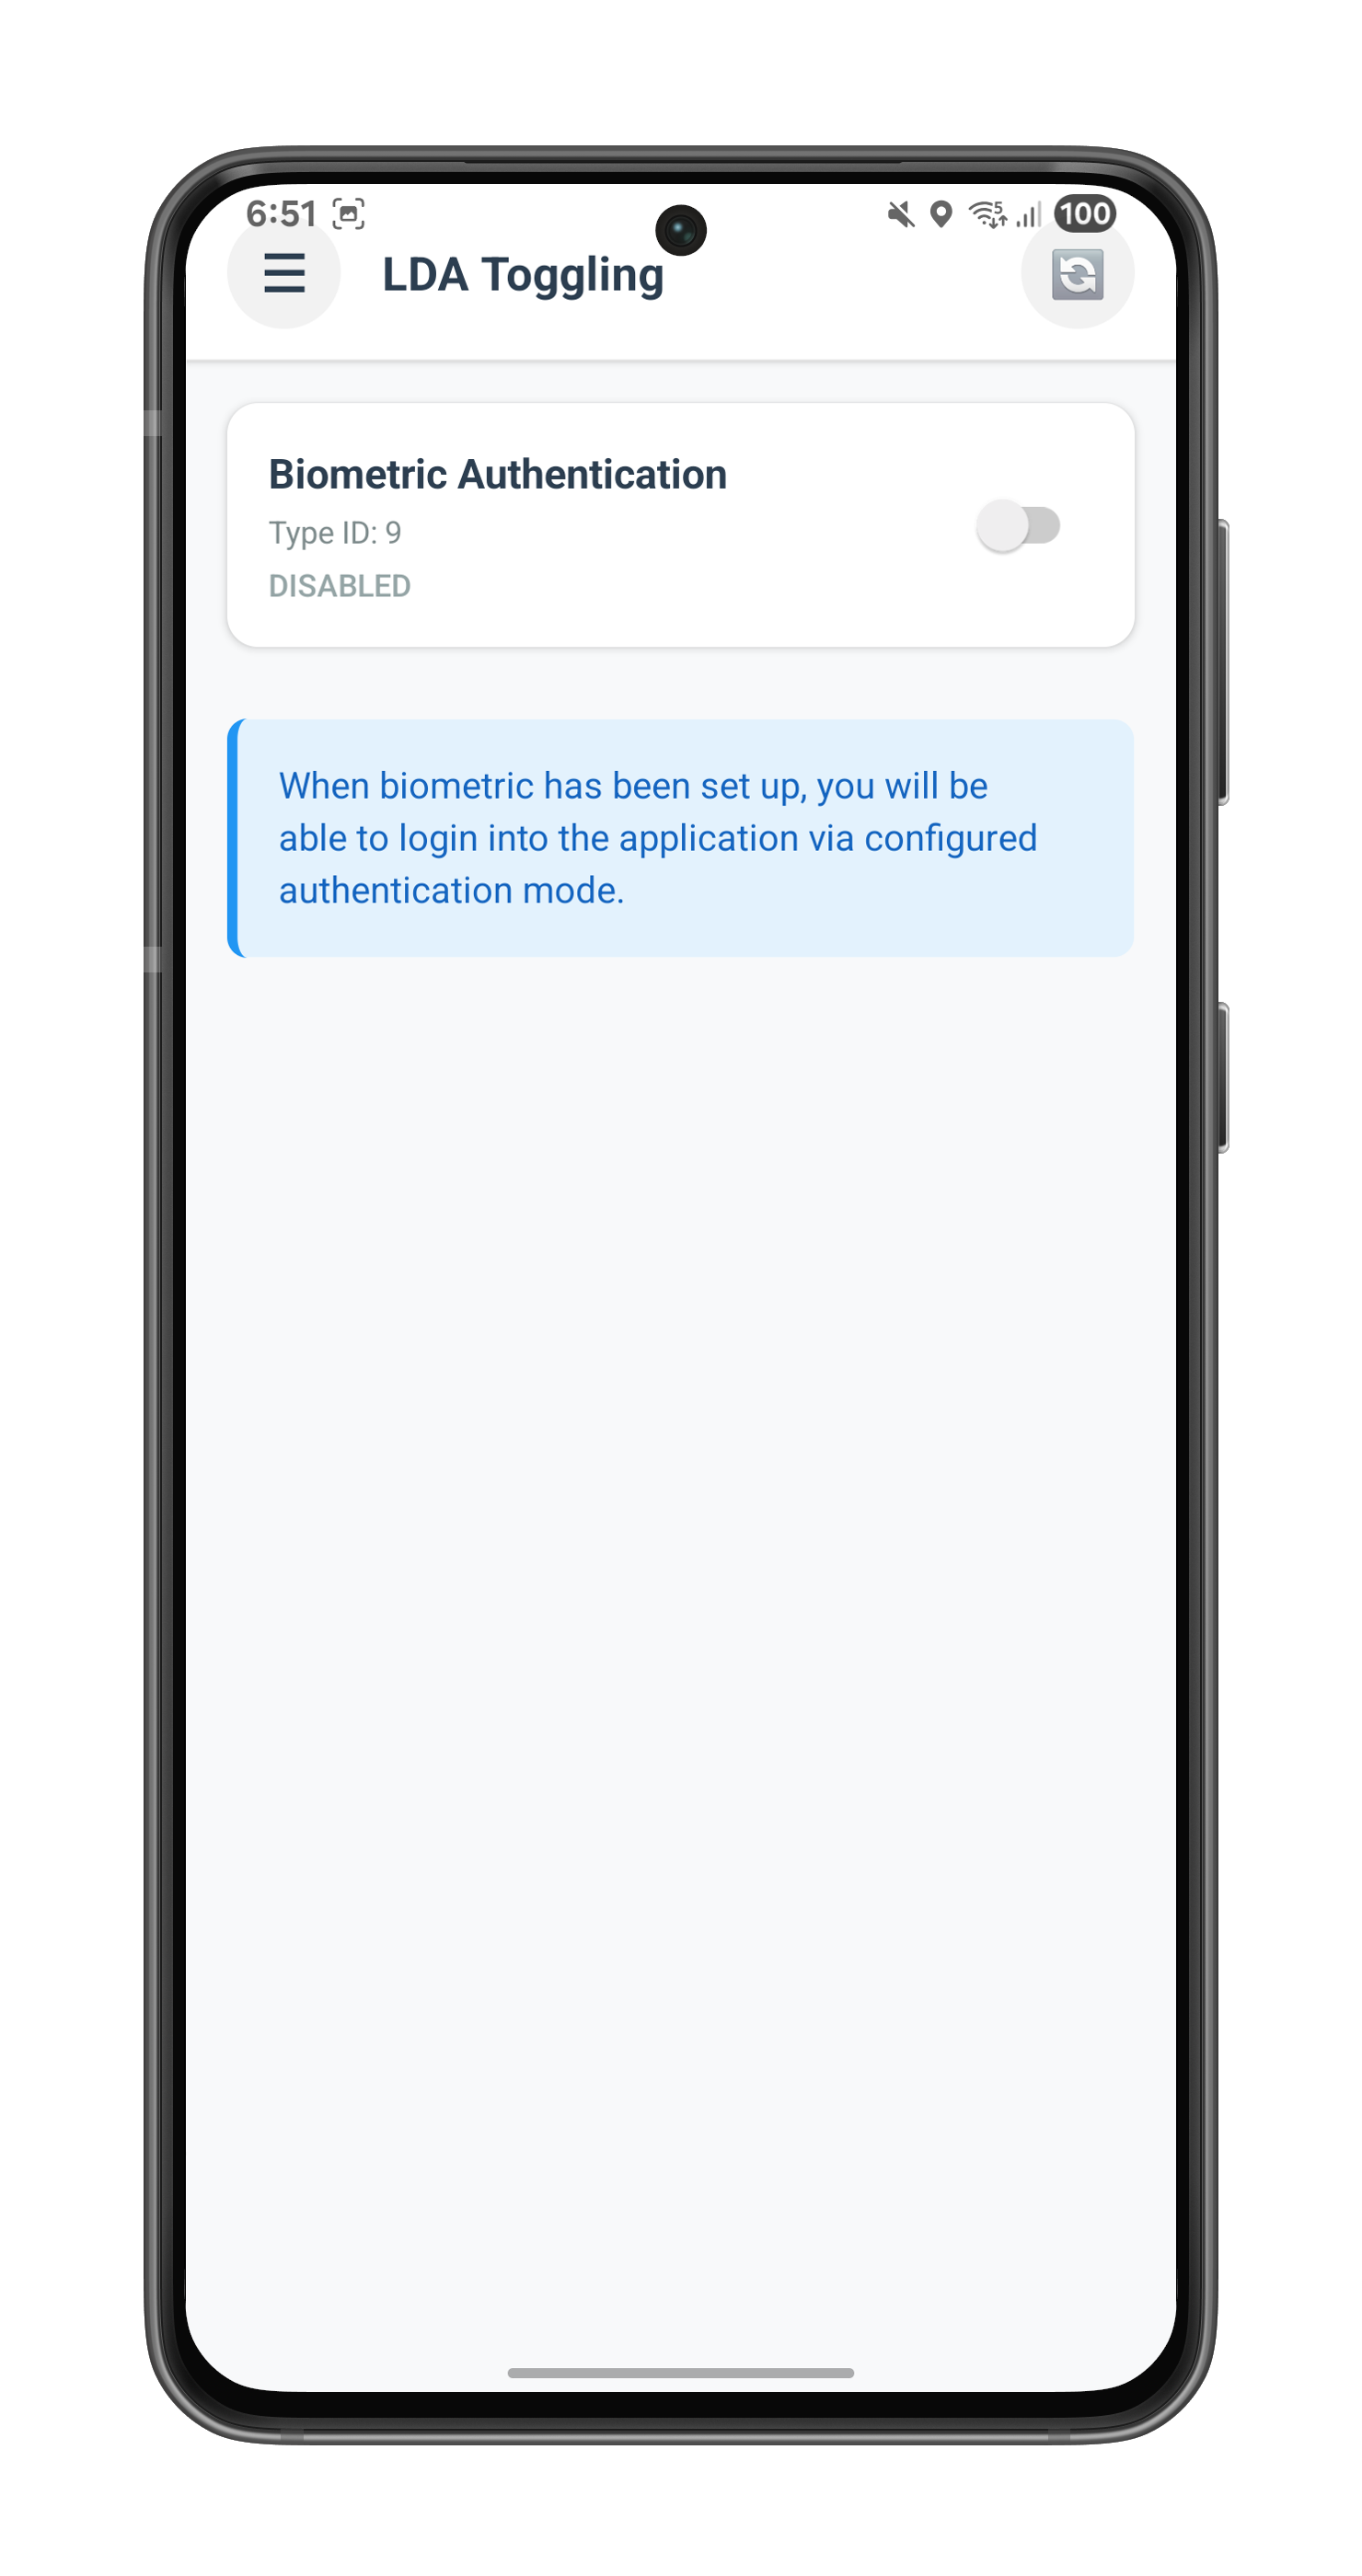
The following image showcases the LDA Toggling screen from the sample application:
Congratulations! You've successfully implemented LDA toggling functionality with the REL-ID SDK.
🚀 What You've Accomplished
- ✅ Device Authentication Detection - Automatic retrieval of supported LDA types
- ✅ Interactive Toggle Interface - User-friendly switches for enabling/disabling authentication
- ✅ Event-Driven Status Updates - Real-time feedback via
onDeviceAuthManagementStatus - ✅ Challenge Mode Routing - Proper handling of password verification and consent flows
- ✅ Production-Ready Code - Comprehensive error handling, loading states, and type safety
- ✅ Seamless User Experience - Auto-closing screens and clear status feedback
🔄 LDA Toggling Flow Summary
Your implementation handles two main toggling scenarios:
Password → LDA (i.e. Enable Biometric):
User toggles ON → Password Verification (mode 5) →
User Consent (mode 16) → Status Update → Biometric Enabled
LDA → Password (i.e. Disable Biometric):
User toggles OFF → Password Verification (mode 15) →
Set Password (mode 14) → Status Update → Password Enabled
📚 Additional Resources
- REL-ID LDA Toggling Documentation - Complete feature guide
- getDeviceAuthenticationDetails API - Retrieve authentication capabilities
- manageDeviceAuthenticationModes API - Toggle authentication modes
- onDeviceAuthManagementStatus Event - Status callback reference
- Password to LDA Flow - Enable biometric workflow
- LDA to Password Flow - Disable biometric workflow
🎯 Next Steps
Consider enhancing your implementation with:
- Custom UI Themes: Match your app's design system
- Biometric Enrollment Check: Detect and prompt users to enroll biometrics
🔐 You've mastered authentication mode switching with REL-ID SDK!
Your implementation provides users with flexible authentication options while maintaining the highest security standards. Use this foundation to build adaptive authentication experiences that users can customize to their preferences.